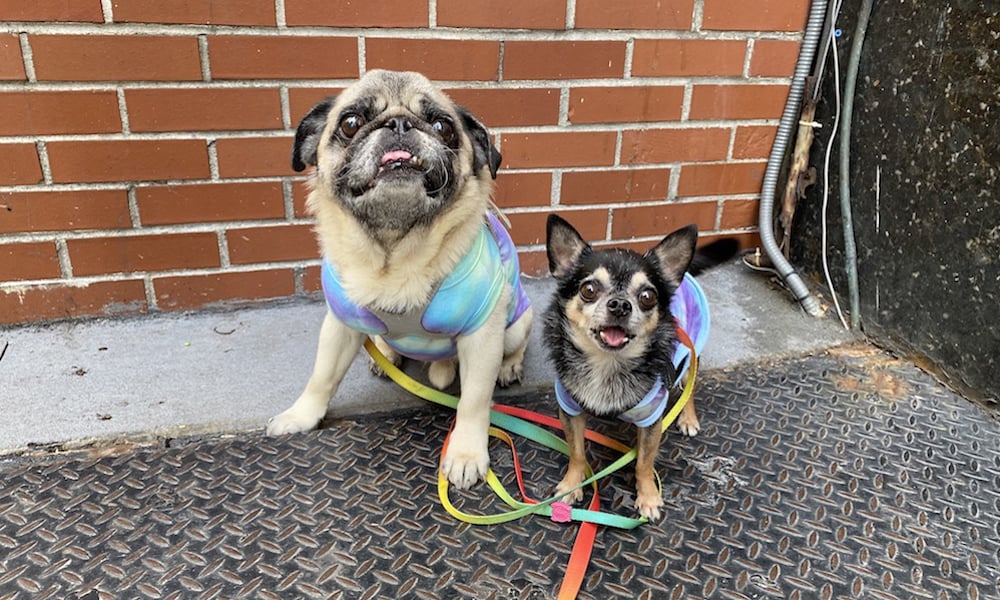
How to Tie Dye Matching Outfits for You and Your Dog
Every time summer rolls around, I get the itch. The tie dye itch! Tie dying is a great craft that you can do at home. It’s super fun and easy – literally anyone can do it, as long as you have the supplies. Here’s how to tie dye matching outfits for you and your dog.
This post contains affiliate links that help keep boogiethepug.com running. To learn more, visit our Disclosure & Disclaimer page.

Here’s how to tie dye at home for you and your dog
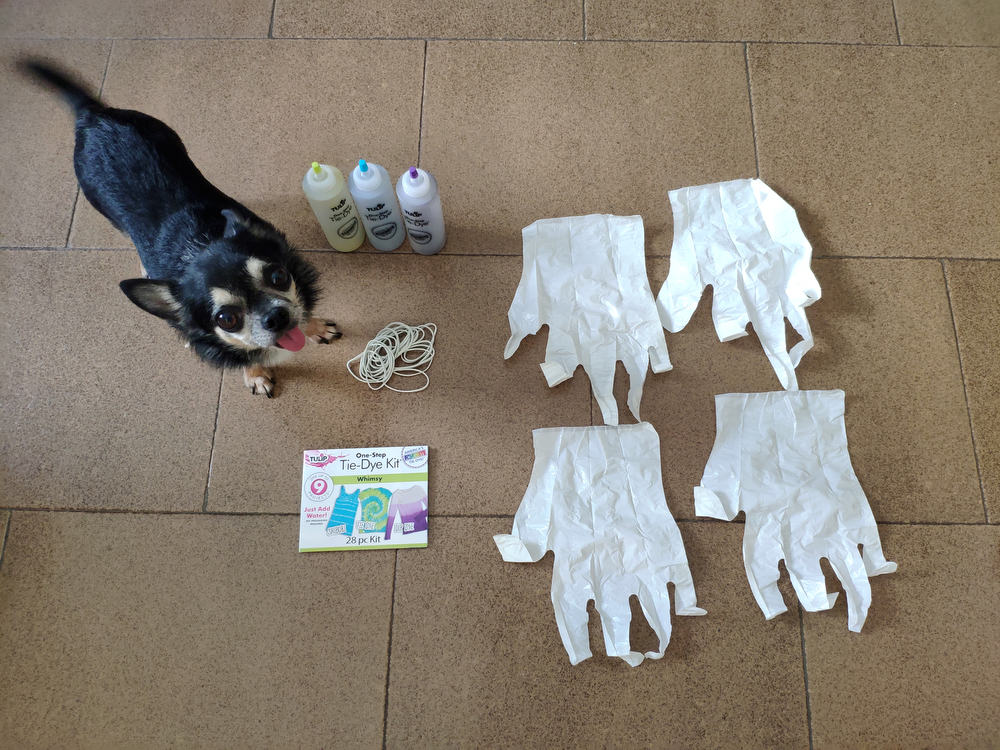
You’ll need:
- Dye
- Squeeze bottles
- Gloves
- Rubber bands
- Plastic bags
- Something to dye
What dye should I use?
I used this tie dye kit that I bought online.
Kits are great because they come with a lot of the supplies you’ll need. The kit I got came with three dyes, three squeeze bottles, two pairs of gloves, an instruction booklet and plenty of rubber bands.
There are many kits sold online that have anywhere from one dye to 18 different dyes. If you’re having a tie dye party, go big! If not, getting fewer dyes, or even just using the bleach you may already have at home, will work.
My kit with three dye colors was enough to dye two adult t-shirts, two dog t-shirts and a pair of socks.
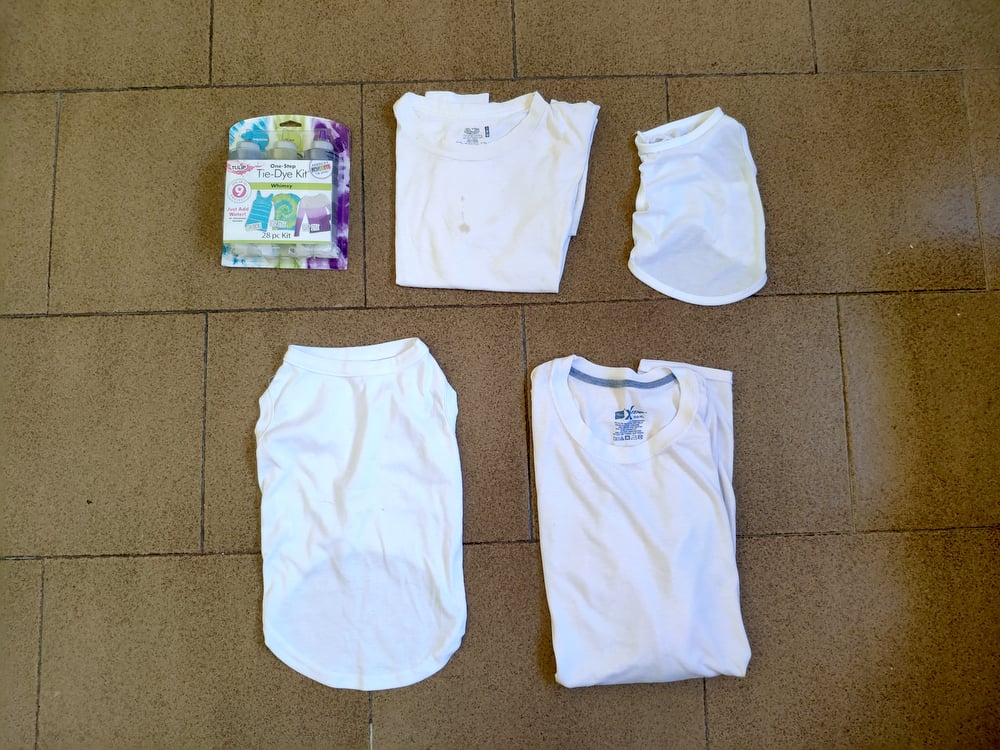
What items should I tie dye?
If you’re using colored dye, it’s best to tie dye an item that’s white.
For us humans, we used old white Hanes t-shirts that we had in the closet. You can order plain white t-shirts online, or pick them up at the store.
For the dogs, we purchased simple white dog tees like these.
If you’re using bleach instead of tie dye, you can pretty much use any color item except for white. Grab something from your closet or pick up an item from a local store or thrift. The darker the color, the better the effect.
Go wild
We tie dyed dog and human tees, and a pair of white socks. Feel free to go wild though! Have an old white sweatshirt? Use that. Have some tank tops or kitchen rags? Try those! You can tie dye pretty much anything.
It’s tie dye time!
Step 1
Gather all of your supplies and choose a work area.
Tie dying can get messy, so I suggest doing this project outdoors. If you can’t, then find an area in your home to work and lay down newspaper or plastic to protect the floors.
We worked in the front area of our home, and laid a plastic poncho on the floor and covered it in newspaper. That was our work station! A large table, covered in newspaper, works too.
Step 2
It’s time to get creative!
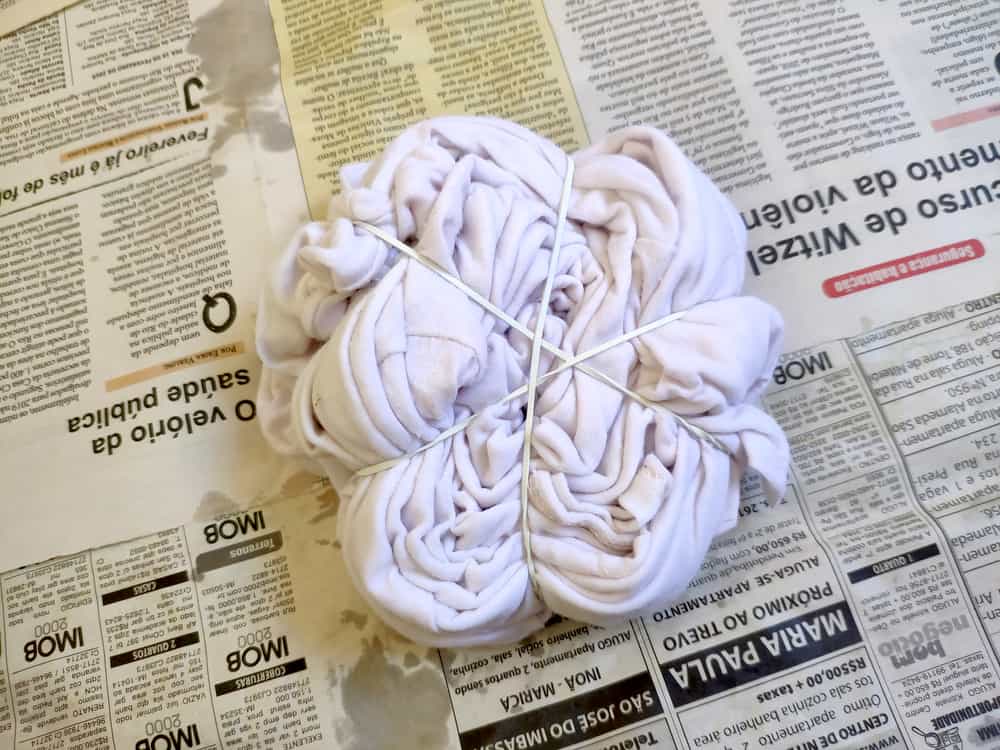
Grab your items and dampen them with water.
Use the rubber bands to tie up your items.
Different tying methods create different tie dye patterns.
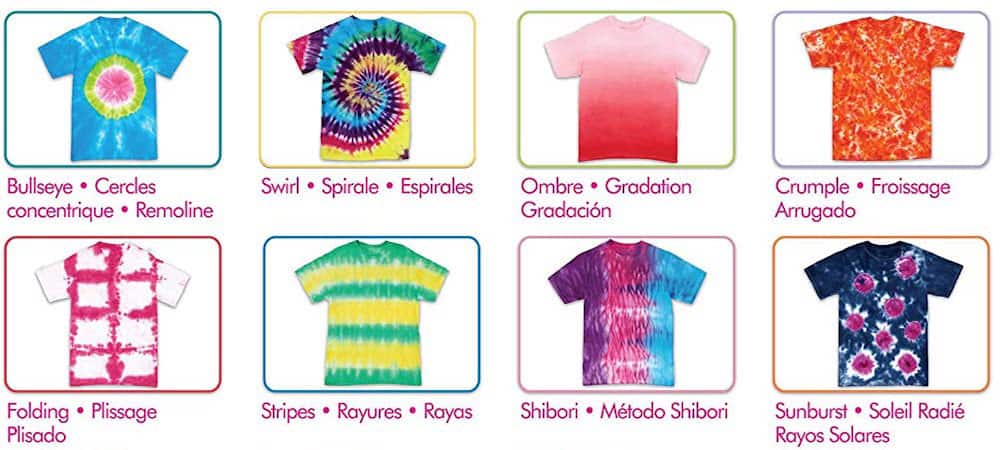
We went with the classic spiral pattern and did it for each of our shirts so we’d match.
To do that, lay your garment out and pinch the fabric at the center of the piece. Start to twist the fabric, and keep going until your garment coils into a flat spiral.
Then take your rubber bands and pull them over the garment, creating a star pattern, like so. It’s like your t-shirt is a pizza and you’re making slices.
You can also just scrunch up your garment with rubber bands if you want a more natural tie dye look.
Step 3
Now it’s time to prepare your dye!
Put on your gloves and fill the squeeze bottles (already containing dye concentrate) with water. Give them a shake.

Now squirt dye on to a section of your garment. Use the slices created by the rubber bands to decide which color should go where.
We used three colors for each garment, and our shirts looked like this.

Turn the piece over and add dye on to the back side.
Be sure to use gloves so you don’t stain your hands!

Step 4
When you’re all done, wrap each garment in plastic and store in a cool area.
We used regular plastic bags and produce bags from the grocery store.
Set it and forget it.
I recommend letting your garments sit for at least 24 hours to let the dye really sink in.
Step 5
After 24 hours, it’s time for the big reveal!
Remove each piece from the plastic bag and rinse it using cold water. You can use a hose for this part, or do it right in the sink.

Then throw them in the washing machine (cold water!) and let air dry.

Ta-da!
You’ve just made yourself some fun tie dye!

Have you ever done tie dye? How did yours turn out?
Click here for some more pet DIYs.
Pin for later!