How to Make a DIY Sweatshirt Dog Bed
Breathe new life into your old sweatshirt by turning it into a pet bed! This is a quick and easy project that you can do at home with items you probably already have around the house.
It’s the perfect thing to make if you have multiple pets, multiple rooms in your house, or if you just want an extra bed to throw around.
I love this project because:
- It’s eco-friendly – repurpose your old sweatshirt or hoodie instead of throwing it out.
- It’s great for your pet – having an extra bed, with your scent on it, is a nice treat for your dog or cat.
- It’s affordable – you probably have all of the required items at home, so there’s no need to purchase anything.
- It’s easy – no sewing machine required (but if you do use a sewing machine, you can make this in like ten minutes).
What you’ll need:
- Sweatshirt or hoodie
- Scissors
- Pillow or cotton filling
- Needle and thread or yarn
- A piece of fabric
- Optional: chalk or pins
- Optional: tape measure

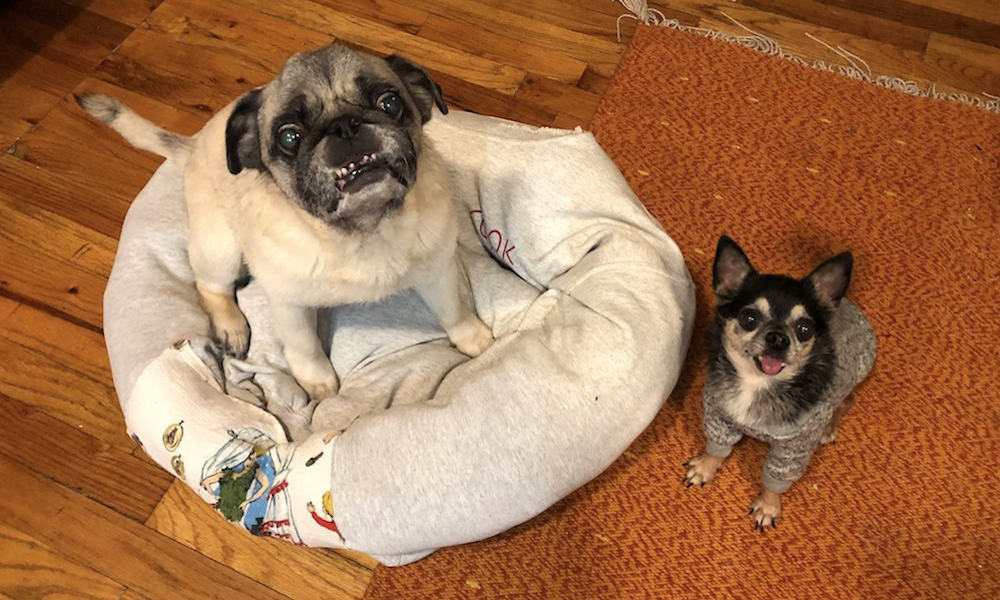
Notes: I wear a size XS, so all of my old sweatshirts are pretty small. I used an old sweatshirt that my partner bought at a thrift store years ago that’s a size XL. It’s cozy and comfy, but it has a stain on it, so it wouldn’t be a good item to donate.
This is a great project to do while you’re watching TV or listening to a podcast. It’s great for kids too, since it’s ok if your stitches aren’t perfect.
Let’s make it!
Pet Sweatshirt Bed
Step 1
Turn your sweatshirt inside out.

Hold the opening of the collar together and sew in a straight line across. You can sew by hand, like me, or with a sewing machine if you have one.
If you’re using a hoodie, you can either cut the hood off and use it later, or sew around it.
Leave a small piece open, like so (see photo).

Step 2
Turn the sweatshirt right side out.
Sew the sweatshirt from armpit to armpit in a straight line across.

It helps to draw a line with a ruler and chalk, or pin a straight line across the front of the sweatshirt. Follow the line with a needle and thread, or sewing machine. If you don’t have chalk or pins, just eyeball it.
Step 3
Stretch the sleeves along the body of the sweatshirt and sew them together. Do this with both sleeves.

Stitch all the way down, but don’t sew the cuffs.
Step 4
Now it’s stuffing time!
Stuff the sleeves all the way around until they are full. Use the hole you left in the collar to help you pull the stuffing around and fill it out.
If you don’t have cotton filling, don’t worry! I used old fabric scraps, an old blanket, old panty hose and socks with holes in them to fill out my arms. You can pretty much use any soft material you have around the house.

I like to use pieces that I can’t donate because of stains, holes, or just general poor condition. Instead of throwing them in the trash, they get repurposed into something new!
If you used a hoodie and didn’t cut it off, it’ll be on the inside and become part of the stuffing. If you did cut it off, see below.
Make sure to massage things a bit so it’s not lumpy and stays even throughout.
Step 5
Fill the belly of the bed. You can use a pillow, stuffing, or any old scraps or clothing as mentioned above.
Step 6
Sew the bottom of the belly shut, as well as the hole that you left on the collar.
Your bed should look like this. Almost done!

Step 7
Sew the cuffs together. If you want, you can leave your bed like this, and ta-da, you’re done! But the cuffs might look a little weird, and in that case, do the next step.

Step 8
Take a piece of fabric and sew it around the cuffs. I used a scrap of Peter Pan material I had. If you cut your hood off, you can use that fabric.

Then twist it around to hide the seam.
You’re done! You’ve got a brand new cozy dog bed.

Do you plan to try this out? We’d love to hear about it in the comments!
Click here for more DIY projects.
Pin for later!


This is literally one of the best ideas I’ve read about in forever. thanks for sharing!
Thank you for sharing the details step by step.